113-year-old St. Paul house goes all-electric!

December 2023

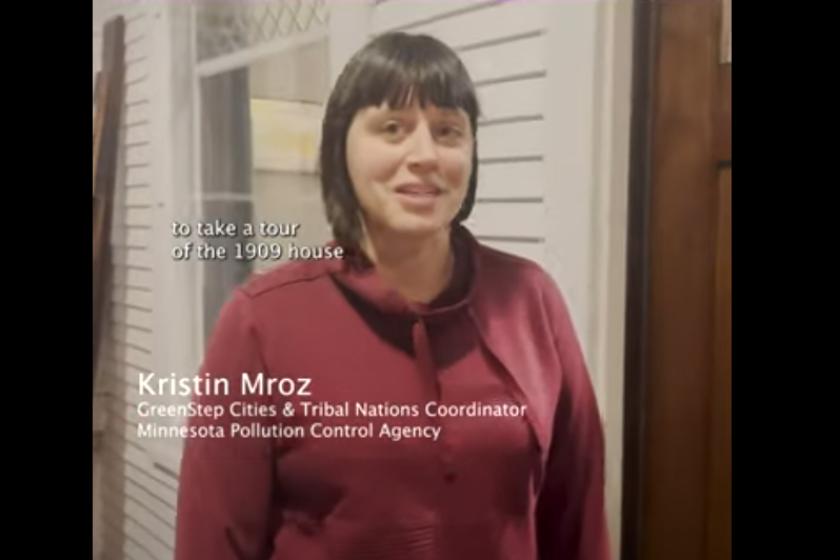
The following is a piece by Kristin Mroz Risse. Mroz Risse is the co-director of the Minnesota GreenStep Cities and Tribal Nations program and works at the Minnesota Pollution Control Agency. MN GreenStep is a challenge, assistance, and recognition program for communities working on their sustainability and climate action. She helps connect communities to their peers, technical assistance providers, and other opportunities that can support communities at any part of their journey. 

In October, 2022...

my husband William and I purchased a 1909 home in Saint Paul. We knew that it needed some remodeling since the last updates were from the late 1970’s. We also knew we wanted to update the HVAC system to be more energy efficient. Well, one thing led to another and 12 months later, we finally moved into an all-electric, emission-free home.

We worked with a general contractor, Justin Riddle, with Paltrin, who we found after touring some Minnesota Renewable Energy Society’s annual Sustainability Tour. Justin helped us navigate the many options for our renovation.

Energy Audit

Like any project undergoing a renovation, we had a complete energy audit prior to the demolition work. We wanted to document the home’s energy use and efficiency so that we could show the change over time. The Center for Energy and Environment (CEE) provided us with a report that shared some recommendations. They shared suggestions for improving insulation and also confirmed that the home’s original windows (with storm windows) were actually performing well but would do better with some simple air sealing around the trim. This was a surprise to me, knowing that windows can often be a priority replacement for energy efficiency, but our mix of single and double-pane windows didn’t need to be replaced just yet.

CEE came back out for the same test a year later, once we were moved in and finished with the bulk of the updates. While we initially had hoped for 40% more efficiency, we actually achieved 72%!

Demolition

With the help of many friends and family, we tackled the demolition of the interior ourselves. Originally, we had thought that we could move only a couple of small walls, replace cabinets, refinish floors, and patch plaster. However, the project grew into a much larger one when we realized the opportunity to open up all the walls. This allowed us to not only fully replace the electrical wiring and plumbing pipes, but also take advantage of completely replacing the insulation.

William and I were fortunate that we were able to continue living in our Saint Anthony Village home until the renovations were complete. For much of the time, the newly purchased house was without electricity, heat, or water. We did have an inspection completed and found asbestos in the popcorn ceiling texture and also in the glue under linoleum flooring and wall paneling (did I mention there was a remodel in the late 1970s!?) which was abated.

Demolition

November 2022 - William starting demo in the kitchen.

Demolition

January 2023 - A view of demolition in progress. It was a mess!

Demolition

February 2023 - More demolition. The blown in cellulose made it really difficult. 

Waste and reuse

One of our goals was to reduce the amount of waste from our project. We were excited to fix up a house and avoid the potential of another buyer tearing the home down to rebuild. The home had original features, like a built-in hutch and bookcase pillars that we definitely wanted to keep. We also took care to keep any useful wood shelving, lumber, and other materials. Keeping with the time period, I searched high and low for reclaimed light fixtures, doors, wood trim. Even new items like some tile were purchased from the Habitat for Humanity ReStore and Better Futures. My biggest score was finding a white enamel sink on Facebook Marketplace and refinishing it myself!

Even with an eye for reuse, we still ended up with five full dumpsters! It’s amazing how much waste comes with construction and remodeling. William found himself climbing in the dumpster after the contractors were done for the day to pull out cardboard, useful lumber, and scrap metal. We even made $700 at the metal recycling facility with a trailer load of pipes, nails, hooks, thresholds, and a lot more. I resold or gave away anything that I could like light fixtures, radiators, cabinets, and even lath. All of this definitely took more time than simply tossing everything in a dumpster and buying new. But the hunt was fun, and I am sure we saved at least two additional dumpsters from going to a landfill!

HVAC System

While we did the demolition work, our contractor, Justin, coordinated bids and explored the many options for our HVAC system. At first we had hoped for a geothermal heat pump system, using the ground's constant temperature of 50 degrees Fahrenheit to heat or cool our home depending on the time of year. However, multiple bids came back $35-50,000 more than we anticipated, mostly due to the topography and heavy tree coverage of our urban lot. Even with the 30% tax credits and rebate options, this far exceeded our budget. So our method shifted to air-source heat pumps. We explored options for both mini-split (ductless) systems and ducted systems. We had installed a mini-split system in our previous house and were very happy with the system for cooling and offsetting some of our winter heating needs.

The prices for both options were comparable for us and since our walls were all open, we opted to install ductwork and air handlers. Our system was modeled using a Manual J Load Calculation that input our home size, weatherization, and system efficiency. We learned that our cooling load was 26k BTU with outside temperatures of 88F and our total heating load was 62k BTU with outside temperatures of -15F. We installed two outdoor condensers that each feed into an air handler (one in the basement for the first floor, and one in the attic for the 2nd and attic floors). This provides us with two zones to heat or cool as needed. The system has been running since August and seems to be working with both the 90+ degree days and the 20 degree nights. As a backup, electric resistive heating is also tucked into the system - although we will be surprised if we ever need to use it! 

A boiler system

The natural gas boiler system that was removed. It had been replaced around 2015 - but with a very inefficient model.

One of the new air source heat pump condensers.

One of the new air source heat pump condensers.

Weatherization

It’s not exciting, but a lot of time and attention was paid to the weatherization of our home. With the walls open, we had an amazing opportunity to improve the overall efficiency, comfort, and safety of our indoor environment. During demolition, we removed at least five different types of insulation (fiberglass bat, blown in cellulose, rockwool, cotton, newspaper). Doing so allowed us to use spray foam insulation in the walls and roof. Our old home used 2x8 joists for the ceiling joists, while new construction uses 2x10 joists. So we actually added 2 inches of rigid foam onto our attic joists so that we could have a thicker layer of spray foam which increased our R-value.

Another advantage of spray foam over bat or loose insulation is that it also air seals. It can plug all of those tiny holes and gaps that let out heated or cooled air. With the walls open, we made sure to caulk and tape any areas that couldn’t be spray foamed (inside corners or around window and door frames).

Other weatherization included replacing an exterior door and repairing windows. We choose to keep and restore the home’s original windows. A team from Hayes Window Restoration replaced sash cords, made any missing storm windows, and repaired frames one a couple of the windows. They all work, look great, and saved us a lot of money!

Attic with spray foamed walls

Spray foam insulation added to the attic. You can see the roof joists have an extra 2 inches of rigid foam to create more space for insulation and to create a thermal break from the joists to the ceiling.

An example of caulking and tape and more spray foam used to air seal.

An example of caulking and tape and more spray foam used to air seal.

Rim joist spray foam in the basement

Rim joist spray foam in the basement.

Electricity upgrades

On the surface, most of the electrical wiring looked to be ok. However, once the walls were open, we found a number of places where knob and tube were still used, and spliced into the newer wiring. So all wiring was removed and replaced. It’s nice to have some peace of mind knowing that it is all new and fully inspected. We also felt it was important to replace the electrical and plumbing in the hopes of ensuring the home is enjoyed for another 100 years! Our electrical box was also upgraded to prepare for a higher electrical load. During inspection, we were notified that the power line connection into the house was too low for today’s electrical code so instead of raising it, we had it buried with a cable line. 

A highlight was the day that the gas meter was removed from outside of the home! It took some back and forth with our natural gas provider because the only form they have to remove a meter is for a temporary disconnect for a complete demolition and rebuild. In the end it wasn’t much of an issue. I enjoy reflecting back on the home’s energy history. While removing the ceiling in the front entryway, we uncovered the gas pipe that had once been used for what I can imagine was an ornate Victorian gas-lit chandelier. We’ve come a long way!

Appliances

More heat pumps! We purchased a heat pump water heater and a heat pump clothes dryer - both of which work great and don't require anything different to operate. As a bonus, neither requires venting to the outside, further improving our air sealing. In the kitchen, we purchased an induction range. It boils water almost immediately although it has taken some adjustment to cook after a lifetime of cooking over gas stoves. While our cast iron pans work, we did need to replace our standard pots and pans set to one that was compatible with induction. Everything else is ENERGY STAR certified.

New washer and dryer
New fireplace
Kristen in the new kitchen

Costs & Savings

We are looking forward to the rebates and tax credits that are available through our utility, the State, and especially the Inflation Reduction Act. We won’t know how much we were able to save until we file for taxes in 2024 but we are expecting to qualify for household electrification incentives.

So far, we have had one electricity bill that has covered a full month. In September, our bill showed us using 580 kwh for $125. According to the Minnesota Public Utility Commission, this is an average monthly cost for a residential customer. Considering everything that we use is electric and there is no gas bill, we are seeing energy savings already.

Kristen and William pose outside

Home sweet home.

What Next? 

Going all electric is thrilling, but it doesn’t mean much if we are sourcing our electricity with fossil fuels produced elsewhere. Currently, we are Renewable*Connect subscribers, an Xcel Energy program that ensures 100% of our energy usage amount is generated from solar and wind renewable energy sources through Renewable Energy Credits (RECs). 

Next, we are getting quotes for rooftop solar. One of the reasons we purchased the house was because it had a great roof for solar potential! And because we are reliant on electricity, we will be exploring back-up battery storage to ensure that we will have a working heating source in the case of a power outage. 

Our home energy usage will also grow once we add electricity to our garage for charging our EV, a 2017 Chevy Bolt. We currently charge the car elsewhere, so that isn’t included in our September electricity bill. 

Finally, we are excited to share our story and show that an old house can go green! We do realize that this isn’t an average project for most homeowners - we wouldn’t have been able to do this level of renovation and upgrades had we been living in the home already. For me, the biggest lesson learned was that energy efficiency is complicated, messy, and costly. I am thankful for the Inflation Reduction Act that is increasing awareness of projects and providing funds to do so. But it still takes time and some level of understanding to work with contractors and ask the right questions. Based on my experience, I am optimistic that we can transform our homes into clean, healthy, and cost-effective places to share with our families! 

Mroz screengrab

Check out a video of the house from MPR

Sign up for our email newsletter

We encourage reuse and republishing of this story. All Clean Energy Resource Teams stories are made available under the Creative Commons Attribution license, meaning you can share and adapt the work as long as you give us credit. We'd also love it if you link back to the original piece. Have questions or want to chat? Drop us a line.